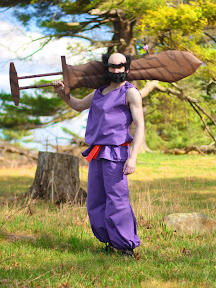
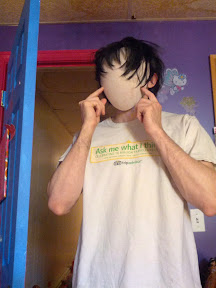
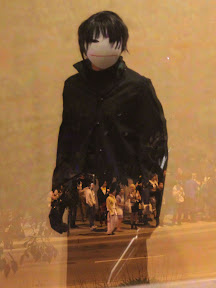
Tutorial for the wig/beard worn by Susano from Okami. Unlike normal wigs, this one is made out of costume beards, and is “Super Muppety” (my wife’s words). It’s really simple to make, and suits the character perfectly.
Material:
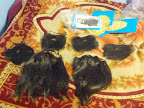
I used 5 cheap halloween costume beards like this one, some Foamie, and black thread to sew pieces together.
Build:
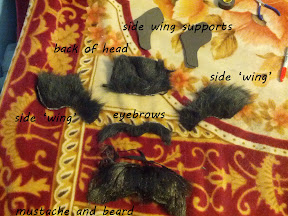
I made the wig in five parts: the mustache-beard, the winglets on the sides of the head, the eyebrows, and the hair on the back of the head. In all cases, I used pieces of costume beards, sometimes having to be creative to get the right shapes/sizes.
The mustache-beard was easy – I took one of the beards, trimmed it (with help from Pocky Princess Darcy), and sewed the mouth hole shut to make one piece. I left the elastic on this one – it’s part of what holds the assembly on my head.
The winglets each required two pieces back-to-back, with a piece of Foamie between them to guide the shape. I hand-sewed the pieces together.
The eyebrows are cut out in a weird McDonald’s shape. I use a small piece of double-sided sticky tape in the middle to keep them in place.
The hair on the back of the head is just a solid cut-out piece of costume beard. I kept the elastic on this one also (actually, because of how I had to carve things, I had to move an elastic to it from one of the other pieces).
After I had all the pieces, I fitted them against my head and adjusted sizing, then hand-sewed them together with black thread. The elastic from the back piece goes under the front piece, and the elastic from the front piece goes under the back piece. I also did some zig-zag type sewing in places to try to prevent unraveling.
And that’s it. Putting it on is a bit of a pain because it’s all loosely connected, but once it’s on, it’s reasonably comfortable, and I was surprised at how little of it ended up in my mouth.
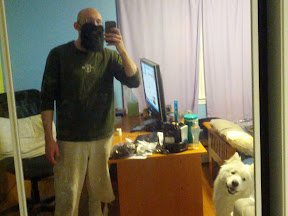
Obviously it helps a great deal if (as I do) you shave your head, but a fake-bald-head-wig should work just fine, too.
While going through a bunch of them, it occurred to me that I could put together a very-short-story type of thing out of some of the shots, so here it is.
Note that the photos weren’t taken with this (or any) story in mind – we were just playing around trying to get good shots.
Tutorial for the mask worn by Hei (BK201) from Darker Than Black, made out of Bondo resin. It’s tougher and smoother than paper-mache, and takes hours to make rather than days (not counting painting time). However (or ‘Plus’), it involves working with toxic materials.
Background:
For Fanime 2011, I made Hei’s costume and dagger. I also made a mask out of foamie, using heat to shape it. It was a dismal failure. Since I had no new costume plans for Fanime 2012, I decided to remake the mask.
There are copious tutorials for making such a mask out of paper-mache (this one seems fine). But that takes several days due to drying times. I didn’t have several days, so I decided to follow more or less those instructions, but with Bondo.
Materials:
Building material: bondo (with hardener)
putty knife (a small flexible one to spread bondo with)
stirrer sticks (something to mix Bondo)
scrap paper (somewhere to mix Bondo)
disposable scoop (something to scoop Bondo out of its container)
latex gloves (don’t touch Bondo when it’s liquid!)
respirator (don’t breathe Bondo when it’s liquid!)
a place to work (a garage will do)
Everything else:
party baloon
measuring tape
sandpaper (preferably also a power sander)
paints (spray and/or acrylic, your choice)
sharpie (for drawing on the balloon)
dremel (to cut out the eyes)
hand file with triangular cross section (to shape the corners of the eyes)
Note! In the comments, Monterey Jack points out that Bondo heats up when setting, and can pop your balloon. If one balloon doesn’t work, it may be worth trying a different type.
Build:
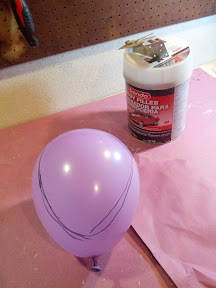
Measure
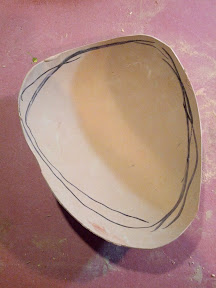
Measure your head with the measuring tape. Inflate the party balloon to more or less that diameter. Draw out the approximate outline of the mask on the balloon with a sharpie.
Base layer
Don your gloves and respirator and crack open the Bondo. You’ll need someplace to mix (I use scrap construction paper) and something to mix with (I use wooden stirrers). Mix a small amount of putty and hardener, as big as a golf ball. Follow directions on the can for the ratio.
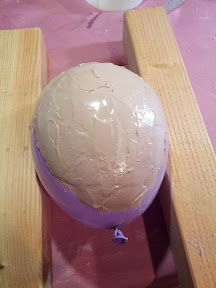
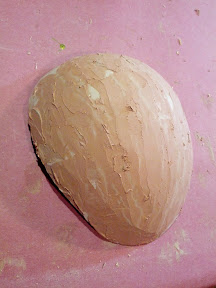
Slather the Bondo mixture onto the balloon using the putty knife, going an inch or so beyond your mask outline. Don’t worry about the result being even. You have about five minutes to work with each batch after you start mixing. As soon as the Bondo mix starts beeing cottage-cheesy, STOP. Throw the rest of that batch away, and mix a new one. You’ll probably have to mix 2-3 batches to cover the mask area.
You should end up with something like this:
(When I did this, I rather wondered if the Bondo would eat through the balloon, like it does with insulation foam. It did not.)
You’ll want to prop the balloon up so that it doesn’t roll Bondo-side down. I used some scrap wood, but whatever you have handy will do.
Wait 30 minutes for the Bondo to fully harden.
Structural layer
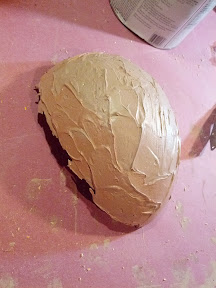
Apply a second coat. Slather the Bondo on liberally, especially near the edges of the mask-to-be. Wait another 30 minutes.
Pop!
Pop the balloon (fun!):
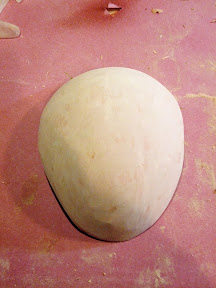
Peel the balloon off the mask (it should come off easily).
Sand
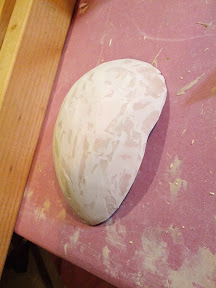
Make the first sanding pass. If you have a power sander, use it. A table belt sander with 80 grit or rougher works great. Hand-sand if you must, but it’s going to suck. With a belt sander, this should take you ten minutes. By hand… maybe an hour.
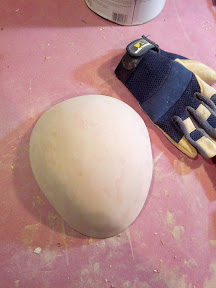
Aim for around 2/3 of the surface to be smooth. If you try to keep sanding after that, you’ll weaken the mask, or even sand holes in it. The result should have a smooth outer surface, and some rough valleys.
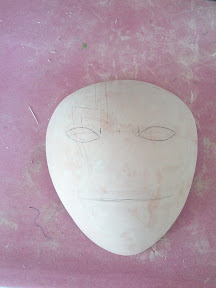
While you’re at it, sand the mask closer to the right shape and size (but leave some room for adjustment). Sand, don’t try to cut. Note that the sharpie should have conveniently transferred off the balloon onto the Bondo:
Smooth layer
Apply another coat, but only put Bondo down on the rough patches, and use the putty knife to smooth things flat. This coat is for smoothness, so take your time, and really make sure you get bondo into all those gaps. Wait for it to harden.
Finish sand
Sand again with 80 grit. You should end up with a nice smooth surface. If it’s necessary, repeat the above step for a fourth coat. (I didn’t feel the need.)
Hand sand with 100 grit or finer to get a nice smooth finish. The remaining discolorations are from inconsistent Bondo batch mixes, not from roughness.
The mask is now built, and should’ve only taken 2-3 hours including drying time.
Features
Draw and cut out the eyes with the Dremel. Use a cutting bit to make a center incision, then use a sanding bit to shape the eyes. Use the triangular file to get the corners of the eyes. Also, sand the mask shape to exactly where you want it to be.
Paint
Paint. I used spray primer and flat white paint, and then acrylic paint for the lightning bolt and mouth. This step took me a long time (I’m no good with a paintbrush and had to reprimer and start over several times.)
Attach
Add anchors to be able to wear the mask. I used two magnets on the back, which attach to a band that goes around my head under my wig. If you’re going to do that, glue before you paint, otherwise the glue will bond to the paint, and the magnets will come off with the paint. (As I learned the hard way, and you can see in the photo here.)
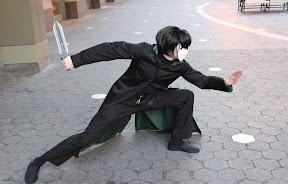
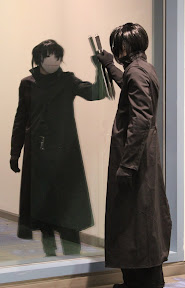
Sample photos
What could be done better?
A balloon is not a perfect representation of the shape of the mask. Really, you want something that curves more around the vertical axis than around the horizontal. Maybe the back of a mannequin head? You can tell that the mask extends a bit far to the sides of my face because of that. On the other hand, the anime is wildly inconsistent (and physically impossible, of course), and this shape is a reasonable approximation.
I’m not perfectly happy with my painting job, either, but this is about my fifth attempt, and I’m not about to reprimer/paint again.
I’m branching this blog off practicalevil.com. This one will be about cosplay-type stuff; mostly build blogs. I’ll move the relevant ones from the old site here anon.